| This is the second part to a three-part post detailing how we used Google Add-ons to make organizing easier for Edcamp35. To see the last post on using FormMule for confirmation emails and email updates, please click here. Add-on #2: DocAppender |  |
*Note: Designing your form well is really important when using the FormMule and DocAppender add-ons. While DocAppender is less likely to be used in the case of edcamp, it can be helpful!*
Basic Add-On Description: DocAppender takes the data from multiple choice questions and populates corresponding information you specify into a Google Doc of your choosing. This add-on for Google Forms is also written by the ever-amazing Andrew Stillman (like all the ones I use!).
An example question in a Google Form might be: Do you want cake? Answer options would include “Yes” or “No”. Google Docs named “Yes” and “No” would be used to store information as it was collected. You could choose to include all the names of people who wanted cake as well as the cake flavours they’d like, giving you a nice slick list after all of the forms are filled out. The document literally gets appended every time someone completes the form, thus the name “DocAppender”.
Add-on’s Function for EdCamp35: To collect data on who would be willing to facilitate sessions and what kinds of sessions they would be willing to facilitate. In edcamps past, we have lacked facilitators in several of our rooms, and new edcampers didn’t know where to start. With our DocAppender list of facilitators, we were able to identify which sessions didn’t have facilitators and we tapped those folks on the shoulder to step up and get those conversations started. This also could be used to track food allergies or requirements if you’re providing lunch, but we used food trucks instead.
Basic How-To:
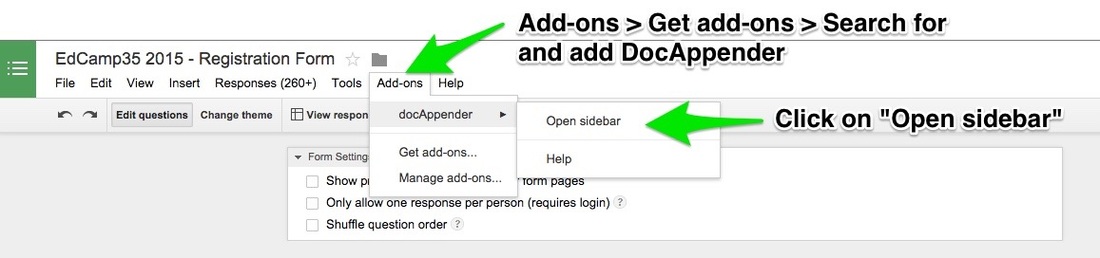
Step 1: Find and install the DocAppender Add-on in your Google Form.
Step 2: Create your edcamp registration process through a Google Form - you’ll have to coincide this step with the original set-up of the Google Form from my first post.
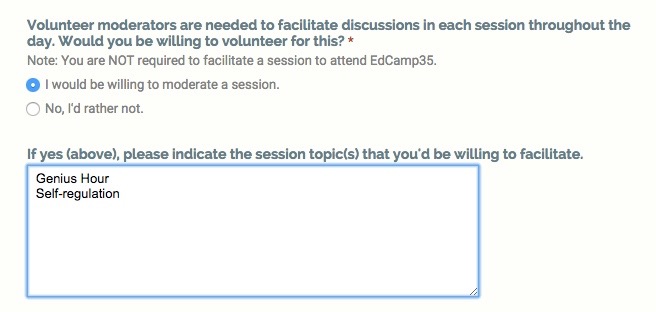
To do this, we created a mandatory question asking, “Would you like to facilitate a session?”. Upon signing up, participants had to choose either
To do this, we created a mandatory question asking, “Would you like to facilitate a session?”. Upon signing up, participants had to choose either
- “Yes, I would be willing to moderate a session.” OR
- “No, I’d rather not.”
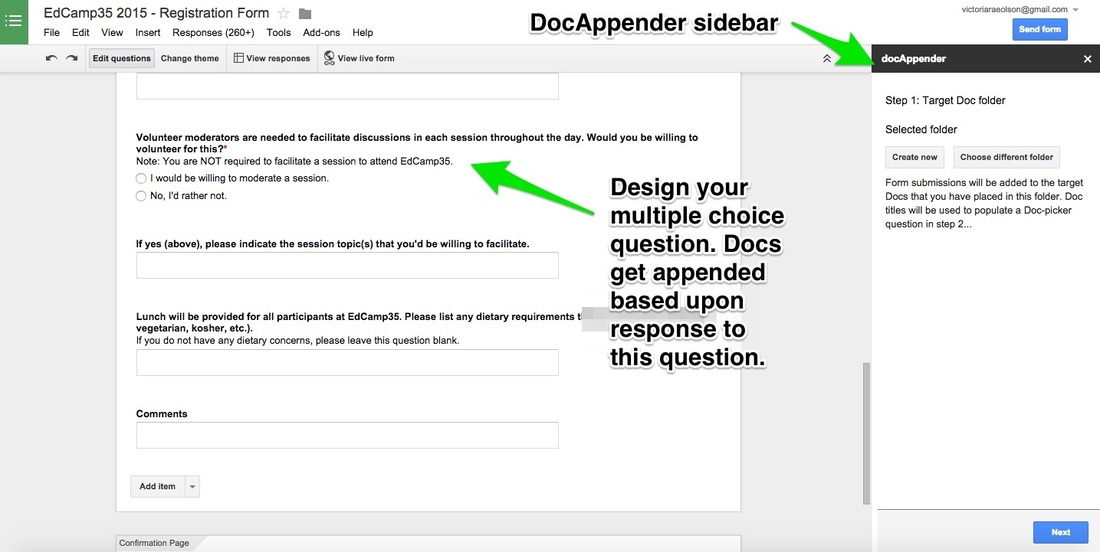
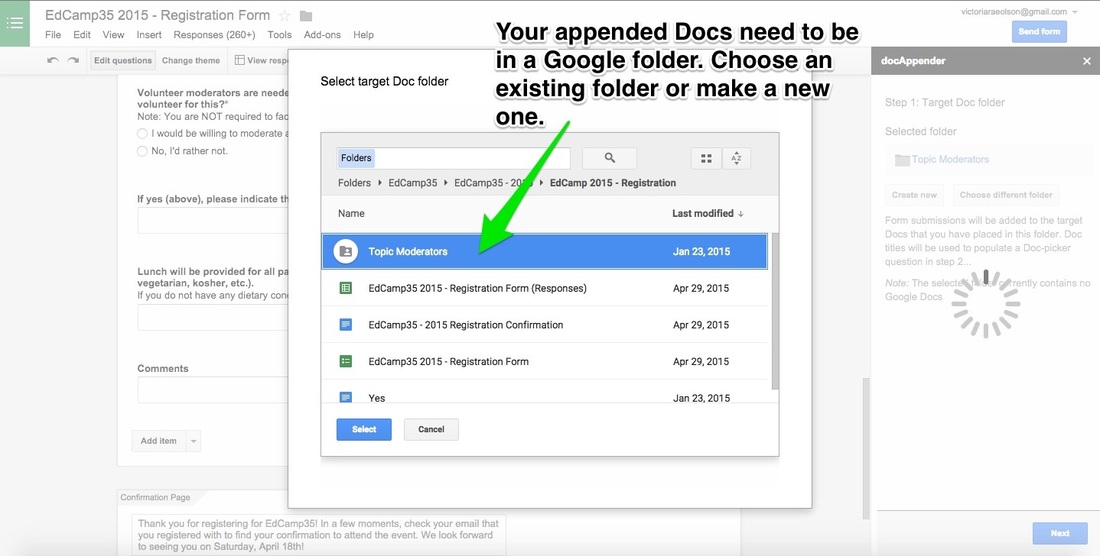
Step 3: Create or choose a Google Drive folder that will hold your documents to be appended. After you select your folder, click the "Next" button on your DocAppender sidebar.
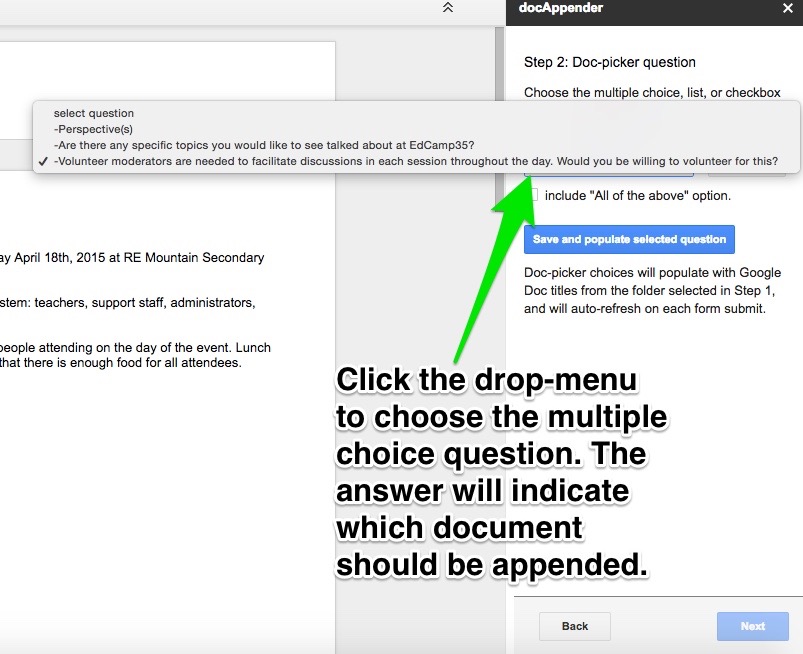
Step 4: Indicate which multiple choice question you would like to create documents for. Google Docs will be automatically populated for you within the folder you chose when you click the “Save” button. These Docs will be named exactly as the responses to the question you’d like to collect data on. Our answers were: “Yes, I would be willing to moderate a session.” or “No, I’d rather not.”, so our Google Docs were called the same thing. Click "Next" when you're done.
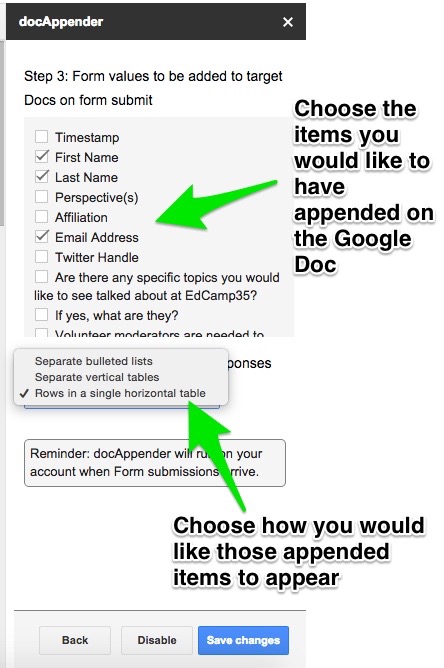
Step 5: Choose all of the data on your form you’d like appended to each document and how you would like it to appear. Every time a response is submitted, that information would get populated into each document. We only really needed data from one of the responses, but you have to collect both anyways. Click "Save Changes" to complete the set-up.
Step 6: Fill out your form to do a test run of whether or not it worked (remember which response you select!). Check by opening the Google Doc with the response you entered. It should have appended the data you indicated in the set-up!
 | 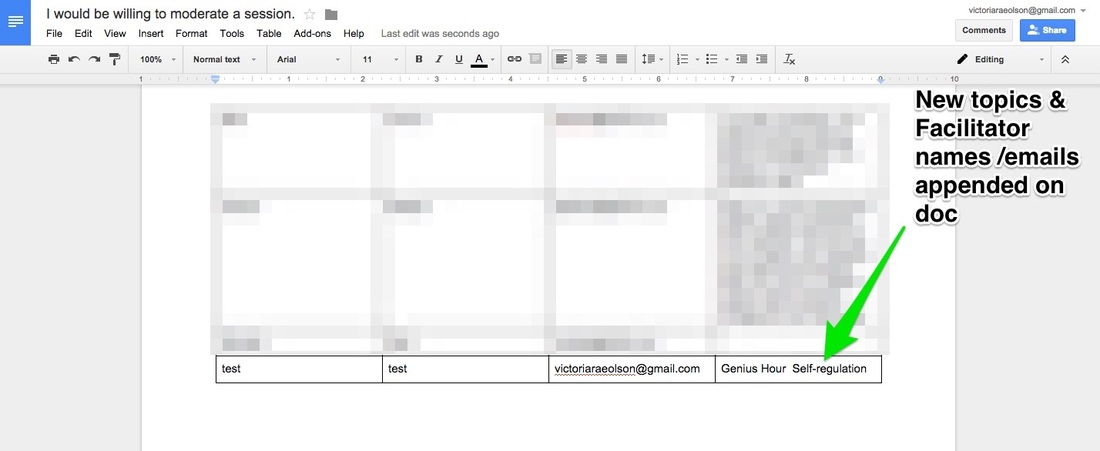 |
For our use with Edcamp35, when a response was submitted, anyone who said “Yes” to facilitating a session would automatically have their name, email addresses, and suggested topics saved in a table on the “Yes” doc. Our organizing team could then contact specific attendees regarding anticipated sessions that might be harder to find facilitators for.
After testing and tinkering to make sure it works, your form link should now be fully ready to send out to attendees! If you are looking for more geeky Google tricks for edcamp organizing, stay tuned on my blog for Part Three which will feature the use of the Autocrat Add-on for EdCamp35!
After testing and tinkering to make sure it works, your form link should now be fully ready to send out to attendees! If you are looking for more geeky Google tricks for edcamp organizing, stay tuned on my blog for Part Three which will feature the use of the Autocrat Add-on for EdCamp35!


 RSS Feed
