• Blog
  • About
  • Digital Portfolio
  • Presentations
    • Ontario Summit 2019
    • Petaluma iOS Summit >
      • You Can Explain Everything and Your Students Can, Too!
      • Getting Going with Google Classroom
      • Capturing Student Ideas with Visual Apps
    • ISTE15 >
      • Connecting the Next Digital Leaders
      • Hacking the Daily 5
      • Passion-Based Learning: Genius Hour, 20% Time, and Innovation Day
    • DENapalooza Vancouver 2015
    • PITA15 Whistler >
      • Passion-Based Learning: Genius Hour & 20% Time
      • Screencasting for Visible Thinking & Learning
    • CUE15 >
      • Hacking the Daily 5 - Rockstar Jam Session
      • Digital Citizenship for the 21st-Century Citizen
    • Odyssey15
    • iOS Summit Vancouver 2015
    • 2014 Presentations >
      • ERAC IL4K12
      • CUEBC14 >
        • Learn How To Drive: Storage & Collaboration in the Cloud
        • SAMR: A Technology Integration Model for Educators
      • SFU14
      • Union SD Tech Innovation Summit
      • CUE Rockstar Manhattan Beach 2014 >
        • Learn How To Drive
        • Screencasting for Visible Thinking and Learning
        • Hacking the Daily 5
      • CA GAFESummit 2014 >
        • Learn How To Drive
        • SAMR: A Technology Integration Model for Educators
        • Passion-Based Learning
      • JET14
      • MERITCon14
      • ISTE 2014
      • CanFlip14 >
        • Screencasting for Visible Thinking & Learning
        • Passion-Based Learning
      • Vancouver GAFESummit 2014 >
        • Learn How to Drive
        • Passion-Based Learning
      • Walnut Grove - Genius Hour in Elementary
      • Odyssey 2014 >
        • SAMR: A Technology Integration Model for Educators
        • Explain Everything! Practical Uses and How-Tos for Screencasting on Your iPad
        • So You Want to Mystery Skype?
      • Roseville GAFESummit - Passion-Based Learning
  • Contact
A Tech Teacher on a Mission

How To Create Your Own Digitized Fonts (Students Can, Too!)

4/23/2015

6 Comments

 
One of my students has been tirelessly writing a book for her Genius Hour project. She has designed the entire layout through storyboarding and has rough illustrations and a manuscript ready to go. She has even hand-drawn her own typography which the story will be written in.

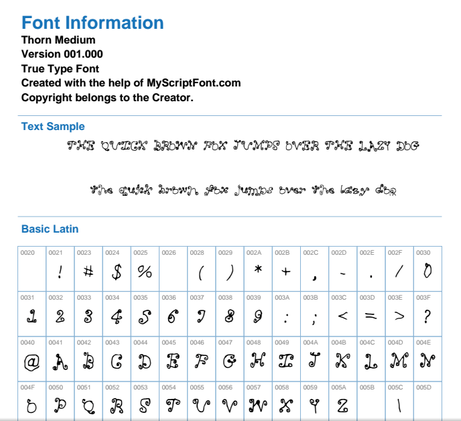
It gets better: One of her classmates’ parents took her typography and turned it into a digitized font. She showed me the file on her Google Drive which had a .ttf file extension name and looked like this:
Picture

Installing the Font

Picture
Finder > Go > Computer > Macintosh HD > Library > Fonts

First, I had to know how to put it on my own computer. On my Macbook Air, I downloaded the file and from my Finder window, I clicked on “Go” in the header menu and clicked on "Computer". In the menu that opened, I clicked on Macintosh HD > Library > Fonts. I then dragged the downloaded file into the Fonts menu, and voila! I was able to use it immediately as a choice in Pages, MS Word, and other OSX apps that allow you to choose your own font! 


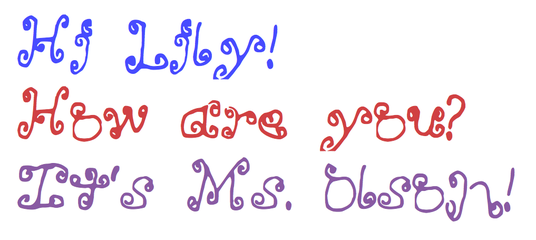
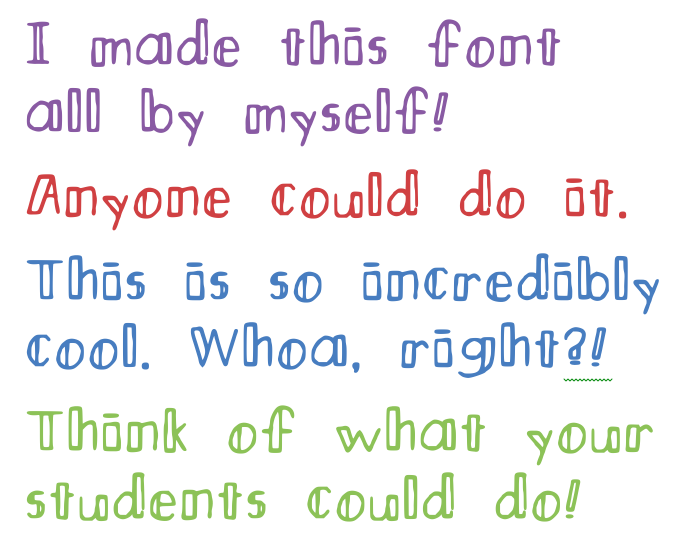
Here is Lily’s font:
Picture

So then I got thinking: how hard could this be? Lily took care of the artistry, but could a teacher deal with the workflow that students would have to go through to digitize it? Or could students do it, too? I quickly found out that both are true because I made my own font using MyScriptFont.com too! 

How to Make Your Own Font Digitally

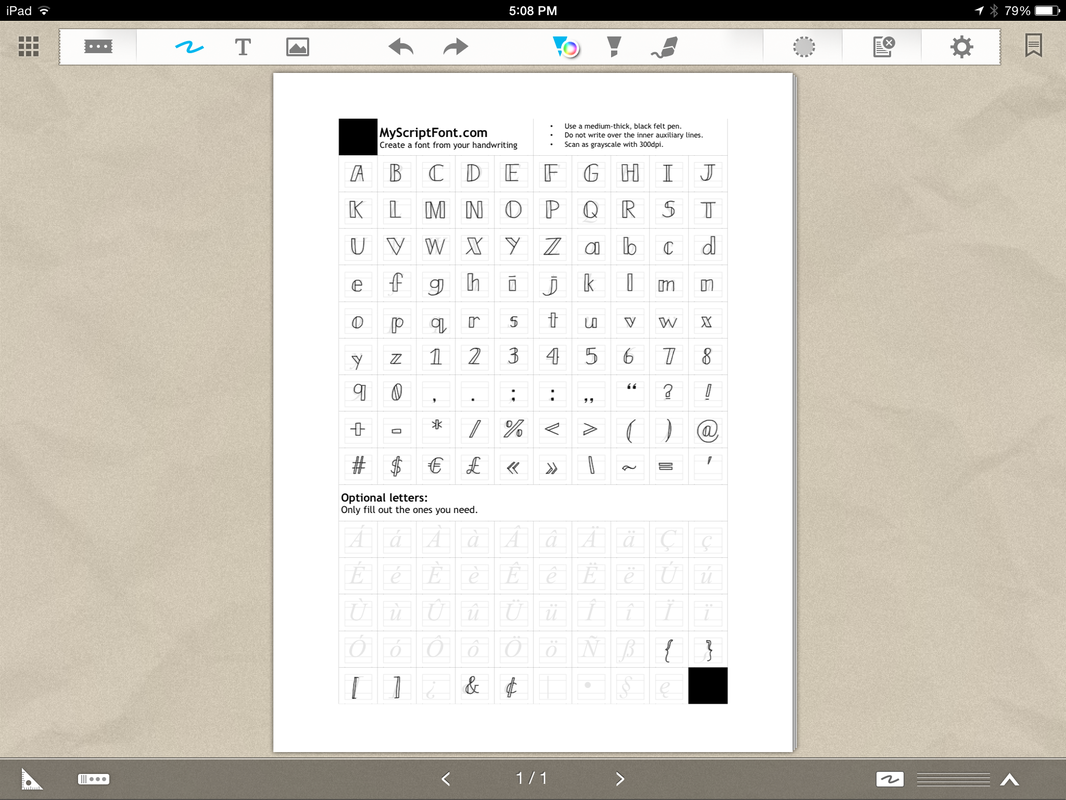
1. Go to MyScriptFont.com and download the available font creation template. You can move the file into the cloud to easily transfer to digital annotation apps, which is what I will outline here. (If you’re not confident with digital workflows, you can print the template, have students fill it out in pen, and scan it to upload to the website.)

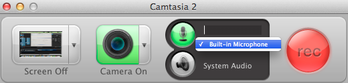
2. I first saved the file in Google Drive and opened it using the UPAD app on my iPad.
Picture
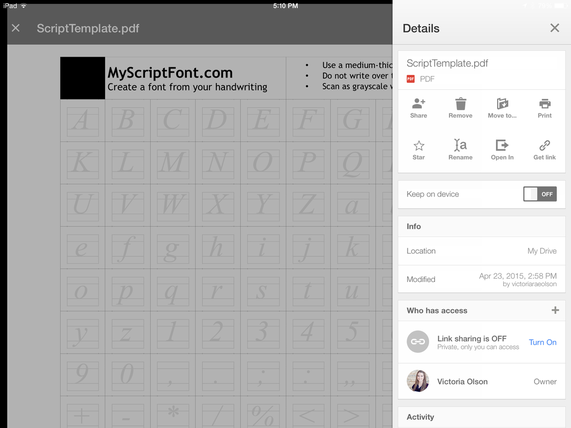
Saved in Google Drive, tap on the "i" and "Open In..."
Picture
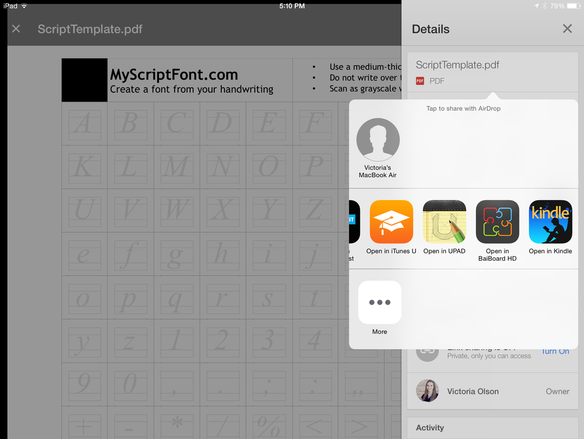
Select your .pdf annotation app of choice. I used UPAD.
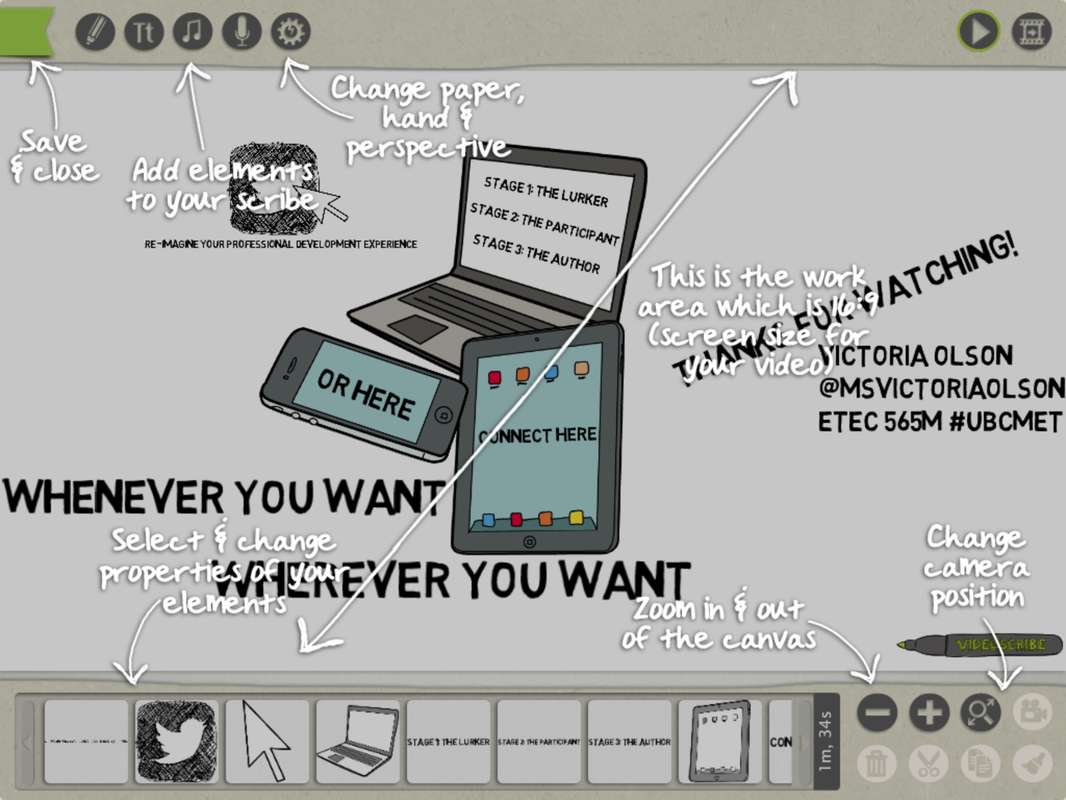
3. UPAD allows me to pinch and zoom easily and use beautifully sleek pen tools to create my typography. Using a stylus for digital font creation is helpful, too! Note that the letters on the template will guide you to know which letters to draw in which boxes, but this can cause interference when drawing. I anticipate this would be a bigger problem in younger classes than in older classes.
Picture
Full view of typography I created in UPAD.
Picture
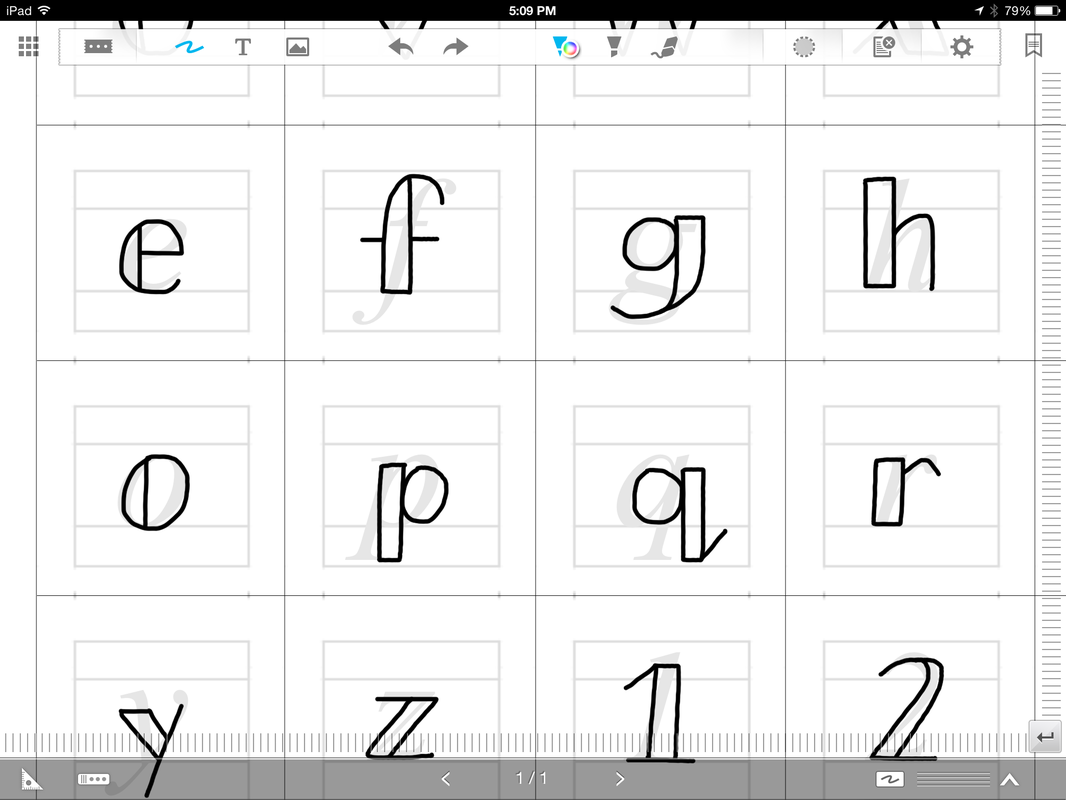
Pinching and zooming within UPAD allows me to draw with precision.
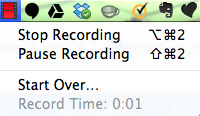
4. After my drawings were complete, I had to export my work back to Google Drive so that I could access it on my Macbook again. I took the file and uploaded it to MyScriptFont.com, where it converted the .pdf into .ttf format. As soon as I installed it on my Mac (using the same steps for installing a font as above), I could use it in Pages, MS Word, etc. WOW! So, so, so easy! 
Picture
So there you have it - teachers and kids could totally do this! Imagine the impact on a struggling writer as they see their own handwriting light up a screen. How motivating! 

Please share screenshots of any fonts your students create with me on Twitter! Happy designing!
Picture
6 Comments

How I Made My Twitter Video...

12/19/2013

7 Comments

 
After creating my video about using Twitter for professional development, I had many members of my PLN asking how I did it. The short answer is "hard work and problem solving". The long answer is me writing a blog post about it, so... here it is.

(Also, you're welcome, Dean Shareski... I've finally done my homework.)

Here is the video below, if you're interested in watching it before reading the rest of this post on how I created it: 
PictureCamtasia 2 by TechSmith
My video editing tool of choice is Camtasia 2 by TechSmith. This is a paid desktop application that is better known for its ability to record audio and video through screencasting and edit the recorded media. 

Like most video editing tools, you can import external media like photo and video to include in your final product. This is how I brought together so many apps to create the final draft of this video. 

Below, I will break the process down into stages and discuss how each portion was completed and how you can replicate this in your own work with video creation.

Picture
Step 1: Recording Yourself 

Camtasia 2 includes this as a recording feature within their app. The settings seen here are the ones that I used for this video. I would recommend using a more high-quality external mic if you have one, as I have difficulty distinguishing the volumes that I speak on each take. (I didn't use a better mic in this video and wish I had, but didn't have one at the time.)

Picture
Camtasia will automatically add the media file to your video project when you stop the recording on your task bar at the top of your computer (PC will look different than Mac). You can also select the option to start over if you need to retake the shot. This action will delete the original media file and restart the recording. If you feel that a portion of the take is usable (don't forget that you can cut anything!!), then select "Stop Recording" so that media file saves. 

Picture
Customizable overlays in Camtasia are available through the Annotations menu within the app. You can select and customize a range of options and coordinate when they appear on your video tracks when building your tracks atop one another. You can also resize them, select where they appear on the media, and/or include external media as annotations such as photo and video. 

Just a note that if you're getting someone to shoot your video for you on a device, do not let them commit the crime of Vertical Video Syndrome. You'll thank me later:

Picture
Photo by Buster Heine, Cult of Mac
Step 2: Incorporating and Cutting VideoScribe

VideoScribe is that impressive and aesthetically-pleasing  iOS application that shows a person's hand "scribing" and drawing your video's story. My final Twitter video features many cuts from a single VideoScribe file that I created. This section will outline the basics of VideoScribe and how I made choices on cuts, sequencing, and storyboarding for my final product.

The VideoScribe app houses several free stock images and options that range across a variety of topics. You can also purchase additional images in-app or add customizable images/text. I chose the ones that were directly related to my topic and increased or decreased the "drawing time" depending on where I needed the clip and what I needed it for. For example, the Twitter image at the beginning of the video is prescribed to be about 30 seconds, but you can tailor that to be shorter or longer. If you are unsure of how much time you need the clip to be,  you can also speed up the clip in Camtasia (or whatever video editing tool you're using) after the media is imported. 
Picture
VideoScribe's quick-tips screen
Picture
So when an element is selected at the bottom of the timeline, you can customize and preview the time it plays as well as the animation. I think that the time is the most important aspect to adjust here, as I've mentioned. Some of the clips are ridiculously long and can add quite a bit of time to your video if you don't cut them. You want to have a general idea of the time and how it will fit into your final product before you export your VideoScribe file.

After completing my VideoScribe timeline, I exported the final product to the Camera Roll. I then uploaded it into Google Drive so that I could access it from my Macbook. You could use any other cloud client or you could just connect the old-fashioned way to upload the video into iPhoto. Either way, easy and quick sharing of your VideoScribe file directly to your desktop, and voila! You can then cut up that file to your heart's desire.

Step 3: Other Apps: Keynote, QuickTime, Reflector
Picture
There are two portions of the Twitter video where I utilize image layering and animation effects. Since I was on a mission to learn the most I could about this, I used two different programs for each part. One, I built in Camtasia by adjusting images and layering them over top of one another across multiple tracks. The other I built in Keynote, which was more simple by far. After I created the builds and animations for each image, I played the Keynote in full screen and recorded using QuickTime (you could use Camtasia for this also).

The other app I get asked about often is the Reflector App. This app allows you to Airplay your iPad screen to the screen of your computer. You can then capture the recording through the Reflector App itself, QuickTime, or Camtasia. This is a great app to use when you want to demonstrate something on the screen of your iPad through video. 

Picture
Step 4: Cutting it Up, Layering Tracks, Editing Audio


If I haven't mentioned it already, I have mad respect for professional video editors and creators after doing this project. The crazy part is that I haven't even scratched the surface of what is possible with this amazing technology, but I have already learned so much more compared to where I started. This section will outline some simple tricks when beginning your video editing process.


Cut It UP!

I'm a hack... and I don't mean computer hack; I mean that I like to chop things up . I record huge clips and cut out everything except for the tiny pieces that emphasize my message. Remember, MORE video footage is better than less - always record for longer than you think you have to because you can just cut it if you need to.

Sound Quality Matters!

If I had to pick one part of my video that I disliked, it would be the sound quality. As I mentioned before, I recorded most of my audio through my MacBook's microphone. This can be pretty inconsistent depending on the room and proximity of the mic from the audio source. I recommend using a high-quality mic and/or that one attached to a standard set of Apple earbuds works just fine, too. 

Camtasia allows you to split audio and video tracks so that you can adjust the volume, clip speed, etc. as you work. This can help to make your video shorter, regulate the volume from clip to clip, or to just plain cut out things that you don't want to include. 

Layering Tracks & Annotations - Experiment!

Don't be scared to play with layering image, audio, and/or video tracks over one another to see what they look like and how they can work together. Split audio from video so that you can manipulate each separately. Press the buttons. Drag things over top of one another. Experiment. That's the best way to learn!
Picture
Audio and visual tracks in Camtasia from one of my grad projects
I hope this post has helped some of you folks who were asking about my video!  Video creation is one of the areas that I continue to explore both for myself and with my students. Let me know if you have any other specific questions or if you have anything to add to this post below.
Picture
7 Comments

Is Visible Thinking Enough?

12/12/2013

7 Comments

 
There are several powerful technological tools that can document visible thinking and learning for our students. Screencasting, voice recording, blogging, and video are at the forefront of the movement for student content creation and undoubtedly hold a lot of clout in helping teachers to assess for next steps in instruction.

When creating screencasts, my students' thought processes have become more complex as they speak their thinking about learning processes aloud. They take time to consider their words carefully in order to create authentic recordings of their learning. However, as my students work on these mediums, I'm not convinced that students' simple documentation of their thinking is enough. Sure, it tells something to me as the teacher, but does it reach full potentials for the student? 
Picture
This brings me to the most incredible choice I've made in my classroom so far this year: pushing for a consistent blend student self-assessment, constructive criticism toward and from their peers, and materials that inform my future teaching.

When screencasting, there is nothing more powerful than students listening to the playback of their own thinking. This process of re-reading, reflecting, and re-vamping is necessary in so many other facets of our classrooms, though. The challenge for educators lies in teaching students how to take fair and meaningful reflections and assessments of their own work. Though this is a little bit meta  (learning how to assess your own learning ), it is amazingly powerful when students learn what they need to improve about themselves and their work, and when they choose to do so independently.

Explicit instruction and one-on-one interviews are absolutely necessary in the beginning of this teaching. It helps to set your expectations for each student's self-assessments as well as finding out about theirs. The end result helps them to shape their evaluations of themselves and base this thinking on a growth mindset: "What could I do better?" and "How can I do it better?" 

After seeing the power of this in areas such as reading and math, I have begun integrating multiple student self-assessments into every subject area both with and without technology. My conclusion thus far is that student engagement is not improved simply by use of technologies, but rather, by meaningful student-centred pedagogy. From improving recorded playbacks, to monitoring self-progress through checklists, student blogging, reflection on completed tasks, and goal creation for the future, it has been nothing short of rewarding to watch my students take charge of their own learning. 

How do you your students assess their own work? How do you help students to make appropriate and fair judgments of their own work to improve for the future? Your commentary is appreciated as I continue to build on this aspect of my classroom.

Picture
7 Comments

Remind101: The Safe Way To Communicate With Students and Parents

9/2/2013

11 Comments

 
Picture
Remind101 is a free, safe, and efficient way to communicate with students and parents via SMS (text) messaging.  You can sign up for the service on their website or through their iOS or Android apps on your phone or device. 

Remind101 does not give your subscribers your personal phone number and does not allow for them to reply to your reminders.  Likewise, you cannot access the personal phone numbers of your subscribers. Messages cannot be edited or deleted once sent, either. 

Once you sign up and create a class, Remind101 will generate a domestic phone number and unique class code so that subscribers to your class can begin to sign up.  Any phone that receives text messages will be able to subscribe to your class reminders.

Picture
Through both the web portal and the app, you can schedule SMS messages to be sent out at specific times.  Another cool feature is that if you are composing a message at a late hour - let's be honest, teachers work often work late - you will be prompted to schedule the message to roll out at a more reasonable time.  After all, your subscribers probably don't want to receive a text message at 12:30 AM! 
Picture
The text message interface is set up exactly as a regular SMS message.  In the screenshot below, I have sent the code to subscribe to my class texts, and followed the prompts sent back to set up the subscription.  Having your parents and/or students inputting their full name is important so that you can manage your subscription lists.  You don't want to have anyone on your subscription list that isn't a part of your class.

Near the bottom of this same screenshot, you will see that every time I send out a text message via the Remind101 web portal or iPhone app, my name will appear at the front of the text.  This will remind parents and students who don't save your Remind101 number into their phones that the text is from you. 
Picture
It is my hope that these instructions can help you get set up with this awesome app.  Communicating is easy when you have Remind101! 
Picture
This post will be available for future reference under "Remind 101" on my site. 
11 Comments

Augmented Reality: Getting Started On Aurasma

9/2/2013

5 Comments

 
Picture
Aurasma is the primary app and web resource that I utilize for getting my students to create their own augmented reality (AR).  For those that do not know, augmented reality is the ability to digitally overlay images or video overtop of a static image or "trigger image."  AR is often jokingly referred to as "QR codes on steroids." After creating an aura using Aurasma, you would then point the iPad camera at the trigger image, which would automatically generate the overlay video or image onto the screen of your device. 

There are some specific things that you need to know before getting started with Aurasma in your classroom:

1) You need an account via Aurasma Studio 

Picture
2) Create a Channel for your classroom/class section through your new Aurasma Studio Account
Picture
3) You will need to sign into your account on each device that you will use in your classroom OR follow your channel to see the auras you create on your studio account (see gallery below for visuals)
4) And probably the most important to know before you begin -- **Auras created on devices via the iOS app are DEVICE SPECIFIC. Auras created on the Studio Account CAN BE VIEWED ON ANY DEVICE FOLLOWING THAT CHANNEL**
4)  UPDATE: Auras created on devices can be viewed immediately on other devices that are signed into the same Aurasma account. However, they cannot be added to a channel for other users to view on their devices. (...yet. Perhaps soon on another update!)

When getting started with Aurasma, it would be prudent to go through these amazing tutorial videos on twoguysandsomeipads.com.  The authors of the site are Drew Minock and Brad Waid, and they are leaders in the field of augmented reality in education.  There is also a fantastic compilation on their site of "Meaningful Integration of AR in Education," co-authored by several educators, myself included, that hosts some amazing ideas of integrating augmented reality into the classroom. 

Happy augmenting of reality! Thanks for reading!
Picture
This post will be available for future reference in the "Augmented Reality" section of my website. 
5 Comments

Hardware is Not Enough... People Matter

6/6/2013

0 Comments

 
Picture
Today I, alongside one of my colleagues, had the honour of making a presentation to our local Rotary Club for their generous donation to Gordon Greenwood.  Earlier this year, the Club provided us with the funds to purchase our first 10 iPads and get our technology program off the ground for our special needs students. 

Before tonight, I'd never been to a Rotary meeting, and to be honest, I wasn't entirely sure what to expect.  I hadn't anticipated the "community" aspect of our role in this project and presenting in front of so many esteemed community members.  Though we were likely the youngest people in the room, we were instantly welcomed as peers and equals.  The inviting smiles and warm conversation occurred not only through our complimentary meal, but throughout the rest of the evening. 

The most important part of the meeting, though, was our presentation about how technology has impacted our school.  Our students are engaged and excited about going to Learning Assistance.  Kids who have difficulties with reading, writing, and math are getting the adaptations they need in order to be successful at school.  Previously resistant teachers are jumping on board after seeing the positive results of iPad implementation in the Resource Room.  A small grant from a local community club was turned priceless in the hands of passionate educators, a team of educators I am proud to say I've been a part of.

Bringing this success story back to the community members that made this possible was also priceless.  A comment from Langley City's mayor sat with me at the end of the Club's meeting. I may be paraphrasing, but in a nutshell, he said that any community outreach is fundamentally ineffective without passionate implementation behind it.  I agree 100%.  It's not enough for schools or outside agencies to buy technology just for the sake of having it in the hands of students - passionate people who believe in authentic and creative learning is equally as important to have as the hardware itself. 

0 Comments

Educators on iPads - Let Them Play!!!

5/25/2013

2 Comments

 
Part of the technology plan at Gordon Greenwood has been to get iPads into the hands of our teachers and support staff in order to give them an idea of the possibilities that technology can  present for their students. A few weeks ago, Sarban Sangha, a principal at Lochiel U-Connect here in Langley, was kind enough to offer his services to provide a discovery session for our special needs educators. And more recently, I was able to finish the preparation of our teacher sets of iPads to release into the hands of our teaching staff.
Picture
In my opinion, there is nothing more empowering for a learner than hands-on experience. I could stand in front of a group of staff members all day and show them what they could do on an iPad, but none of it means anything to them unless they actually have the iPads in their hands. Moreover, I find that learning on devices is more authentic when the learner makes the discoveries themselves rather than through delivery of app knowledge. The part of these sessions that excites me the most hearing the little murmurs between engaged staff members, "Oh, this would work really well with [Student A]!" or "My low reading group could really benefit from this app!" or "This is a great extension for [subject area]." For teachers who are really stuck in the discovery process, I get them started with  apps like GeoBoard or FindSums that are user-friendly and immediately engaging and they usually move on on their own from there. 

After a few discoveries have been made and some play has ensued, most of the educators I've worked with have aligned themselves with the idea that the devices have something to offer their students.  Following this process, there will certainly be a more vested interest if you do want to introduce increasingly complex apps such as PDF annotators, note-taking, or file sharing apps. Or maybe you just want to show them how to buy an app. It's a neat challenge for teachers to look for apps that matter to their students and classroom, and I'm finding this far more valuable to staff than just me calling all the shots when installing apps. (And it's really fun for me to monitor their discoveries as my device is the Master iPad on our iCloud)

I have found this to be an extremely important first step in introducing iPads to a school and one that I would definitely apply in any school I worked in that was introducing tech. As our school moves toward getting a class set of iPads, it is my hope that these educators continue to be open and excited about what changes are to come. Until then, let them play.

2 Comments

    Author

    Victoria Olson
    A curious and passionate educator in Langley, BC

    Picture

    Picture

    Picture

    Picture

    Picture

    Picture

    Tweets by @MsVictoriaOlson

    Picture

    Picture

    RSS Feed


    Archives

    April 2020
    March 2020
    February 2016
    January 2016
    August 2015
    May 2015
    April 2015
    March 2015
    February 2015
    January 2015
    December 2014
    October 2014
    September 2014
    July 2014
    May 2014
    April 2014
    March 2014
    January 2014
    December 2013
    November 2013
    October 2013
    September 2013
    August 2013
    July 2013
    June 2013
    May 2013
    April 2013


    Categories

    All
    Assessment
    Augmented Reality
    Balance
    Blogging
    Camtasia
    Collaboration
    Communication
    Community
    Creativity
    Design
    Edcamp
    #EdFailFwd
    Education
    Efficiency
    Elementary
    Google Teacher Academy
    Guided Math
    Intermediate
    Ipads
    Multi Age
    Multi-age
    Pln
    Primary
    Pro D
    Pro D
    Pro-D
    Reflection
    Resource
    Screencasting
    Self Regulation
    Sharing
    Tech
    Things That Suck
    Think35
    Twitter
    Video
    #YourEduStory


    Want to subscribe to this blog? Enter your email address below for automatic email updates:

    Enter your email address:

    Delivered by FeedBurner

Powered by Create your own unique website with customizable templates.